
Salesforce Customer Portal is the Force.com ISV’s natural choice for providing support to users of their applications. However, requiring customers to log in to a Customer Portal using a Salesforce username and password which is separate from their own Salesforce login is cumbersome.
Fortunately, you can configure single sign-on using OAuth, with Salesforce as the identity provider for your Portal. This means that Portal users are identified by their Salesforce user accounts in their own orgs.
This was the approach taken to deliver the FinancialForce Community, which was launched at Dreamforce 2012.
Single sign-on is convenient for your customers, as they can move seamlessly from their own org to your Portal without being challenged for a separate username and password, but this also allows you to automatically update your customer Contact records via the single sign-on process. When the customer first signs-on via OAuth they must agree to share their user information with you in order to complete authentication.
There is a small problem however, relating to sessions. When a customer logs in to your Portal (whether by username and password, or by OAuth) a session id cookie for the Portal session will be created. If the Portal and the user’s own org are on the same domain, say na1.salesforce.com for example, then the customer’s session id for their own org will be overwritten. They could not work simultaneously in both their own org and the Portal, and they would need to log back in to their own org when they finish with the Portal. However, we can overcome this by using a Force.com Site to ensure that your Portal is on a unique domain, for example: foobar.force.com
I will be walking through the steps needed to set up single sign-on into a Portal using Salesforce as the identity provider, and using a Site to make the Portal domain unique.
I will be treading as narrow a path as possible, so I will not be covering detailed Portal or Site configuration. As we’re configuring single sign-on between orgs, we’ll be using two orgs – a vendor org which will host the Customer Portal, and a customer org where we will have our user who will access the Customer Portal via single sign-on.
I recommend working through this process using a trial or developer vendor org before attempting the same in a production org – some steps are irreversible! I am using a clean Developer Edition org for my vendor org, and a second Developer Edition org as my customer org.
Create a Customer Portal in the Vendor Org
Before creating your Portal, make sure that you have a Role assigned to the admin account which you are using:
Setup | My Personal Information | Personal Information

I have assigned my admin user as “CEO”. A role is required because when you come to enable a Portal user on a Contact, the Account owner needs to have a Role assigned.
Now create your Customer Portal:
Setup | App Setup | Customer Portal | Settings
An org can have multiple Portals. Before creating your first Portal, you first need to enable Portals in your org, via a check-box:

Once enabled, the “Convert Portal User Access Wizard” is launched automatically. You can complete this, though it is not needed in a Developer Edition org.
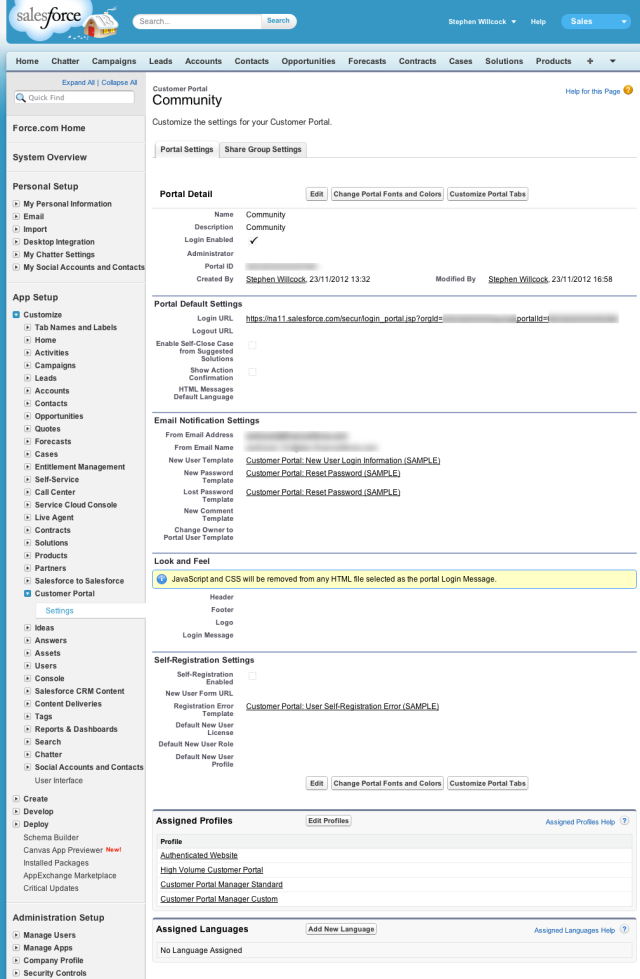
A default Portal called “Customer Portal” is created for you. Note the “Login URL” on the detail page for the Portal – this is used for username/password login to the Portal.
For our test portal, change the name and description of the Portal to “Community”, but otherwise keep all the default settings.
Now create a new test Account. The Account represents a customer, who may have users who need to access your Portal.
Create a test Contact related to this new Account. The Contact record describes an individual who is able to access the Portal on behalf of the customer. Enter the contact name and email address. The email address must be the same as the email address for a user in our customer org.
When we come to authenticate a Portal user by single sign-on, the Salesforce authentication provider will present us with details of the user in the customer org, including the email address.
We will use the email address to find the Contact and associated Account, and then set up a Portal user in the vendor org from this user information, which will be tied to the Contact.
We can now test our Portal configuration using conventional login. You can skip this step if you wish, and move straight on to configuring single sign-on in the vendor org.
Select “Enable Customer Portal User” for the test Contact – from the “Work With Portal” combo-button on the Contact detail page. This will create a Portal User and link the Contact record with this new User.

Accept all the defaults for this user, though if you’re using the same email address as your Admin user, you will have to make the Community Nickname unique.
On saving the user, you will receive a new user email for this Portal user, with a username and password.
Now go to the Portal login page using the Login URL from Community Portal detail page, and enter the username and password from the new user email.
Having set a new password for the user, all being well you will now be logged into the Portal:

That completes the test; we now need to undo the association of the Contact and Portal User – as we will want to test the same process via single sign-on.
Log back in to the vendor org as administrator. Select “Disable Customer Portal User” for the Portal Contact – from the “Work With Portal” combo-button on the Contact detail page. This will permanently break the relationship between the User and the Contact, and will make the User inactive.
Configure Single Sign-on in the Vendor Org – step 1: Connected App / Remote Access Application
Currently Salesforce are piloting a new feature: Connected Apps. Connected Apps will replace Remote Access Applications.
New Developer Edition orgs have Connected Apps enabled, whereas production orgs are more likely to use Remote Access Applications (unless opted in to the Connected Apps pilot). However, the configuration for each is similar.
A Connected App or a Remote Access Application needs a callback URL. The callback URL is generated for you when creating an Authentication Provider – in a later step. However, the Authentication Provider requires a consumer key and secret which are generated on creation of a Connected App / Remote Access Application.
This circular dependency is easy to break as the callback URL follows a straightforward pattern and is easy to construct:
https://login.salesforce.com/services/authcallback/[18digitOrgId]/[urlSuffix]
For example:
https://login.salesforce.com/services/authcallback/00DG0000000aaaaAAA/community
An easy way to obtain the 18-digit Org Id is to execute the following statement in the Developer Console:
system.debug(UserInfo.getOrganizationId());
Your Org Id is of course available from:
Setup | Administration Setup | Company Profile | Company Information
However, the 15-digit case-sensitive Id is displayed here, whereas we need the 18-digit case-insensitive version.
The URL suffix can be whatever you want – we’re using “community”.
Now go to Remote Access Applications:
Setup | Develop | Remote Access
If your Org has Connected Apps enabled, you will be redirected to:
Setup | Create | Apps
(a) Connected Apps
If you have been redirected, click “New” under Connected Apps list, and:
- Provide a name for your Connected App: “Community”
- Enter your email address under Contact Email
- Enter the callback URL which you constructed above, e.g. https://login.salesforce.com/services/authcallback/00DG0000000aaaaAAA/community
- Add all the available OAuth scopes

Take care when specifying the name – it can be used only once – even if you delete the original App.
Having saved the Connected App, we are provided with a Consumer Key and Secret, which we will need when we come to create the Authentication Provider:

(b) Remote Access Application
The process is similar in an org where Connected Apps are not available, and you were not been redirected from: Setup | Develop | Remote Access
Click “New” to create a new Remote Access Application, and:
- Provide a name under Application: “Community”
- Enter your email address under Contact Email
- Enter the callback URL which you constructed above, e.g. https://login.salesforce.com/services/authcallback/00DG0000000aaaaAAA/community

Having saved the Remote Access Application, we are provided with a Consumer Key and Secret, which we will need when we come to create the Authentication Provider:

Configure Single Sign-on in the Vendor Org – step 2: Registration Handler
Create a new class, named CommunityRegistrationHandler. This plugin is used to define the automated behaviour we need when a user accesses our Portal via single sign-on.
An example Registration Handler implementation is available directly from the Force.com Apex Code Developer’s Guide. However, for this walkthrough I have provided a prototype implementation which:
- On first authentication
- Finds the Contact by email address
- Finds any User already associated with the Contact
- Updates basic User information, or creates a new User if none already associated with the Contact
- On subsequent authentication updates basic User information
The complete source code is available on Github.
Configure Single Sign-on in the Vendor Org – step 3: Authentication Provider
We are now ready to define Salesforce as an Authentication Provider:
Setup | Security Controls | Auth. Providers
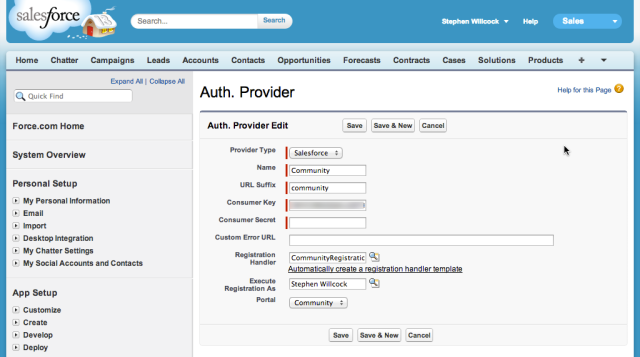
Click “New”, and choose Salesforce as the provider type, and then:
- Enter “Community” as the Provider name
- Enter “community” as the URL Suffix (this must match the URL suffix chosen for the callback URL, above)
- Paste in the Consumer Key and Consumer Secret copied from the Connected App (or Remote Access Application) above
- Select the CommunityRegistrationHandler class previously created for the Registration Handler
- Pick your admin user for “Execute Registration As”
- Select your previously configured Portal

Having saved your Authentication Provider, the detail page will show several URLs:
- Test-Only Initialization URL
- Single Sign-On Initialization URL
- Existing User Linking URL
- Callback URL
Important: Check that the callback URL matches the callback URL that you configured for the Connected App (or Remote Access Application), above. If it doesn’t match, you should correct the callback URL in the Connected App (or Remote Access Application).
We should now test the Authentication Provider by navigating to the Test-Only Initialization URL provided on the Auth Provider detail page. Once you browse to the URL, log in as your customer org user. Having done so you should receive an OAuth challenge similar to this:

This is the challenge your customers will receive when first accessing the Portal.
If you click “Allow”, you will receive an XML response showing the user info which will be presented to your registration handler during authentication, for example:
<user>
   <id>000A0000000AAAAAA0</id>
   <org_id>00DG0000000aaaA</org_id>
   <first_name>Stephen</first_name>
   <username>someone@somewhere.com</username>
   <email>someone@somewhere.com</email>
   <portal_id>000A00000000AAa</portal_id>
   <locale>en_GB</locale>
   <link>https://login.salesforce.com/id/00AA0000000AAa0AAA/000A0000000AAAAAA0</link>
   <last_name>Willcock</last_name>
   <provider>Salesforce</provider>
   <full_name>Stephen Willcock</full_name>
 </user>
Note – you can revoke this access in your customer org:
Setup | Personal Setup | My Personal Information | Personal Information
Granted accesses are listed in the Remote Access related list – any of which can be revoked with the “Revoke” link.
Configure a Site for Portal access
Before you can create a Site, you will need to configure a unique domain name for all of your Sites:
Setup | Develop | Sites

Take care with this; note the warning: “You cannot modify your Force.com domain name after the registration process”
Also note that for a Developer Edition org, the domain is qualified by org type and instance. In production the domain name follows the simple format: [siteDomainName].force.com
Having set your Sites domain, create a new Site:
- Set the site name and label to be “Community”
- Set the default URL (suffix) to be “community”
- Check the “Active” box
- Pick the system generated “InMaintenance” page as the Active Site Home Page
Having saved the Site, configure “Login Settings” from the Site detail page:

All that is required here is to enable login for the Community Customer Portal:

Add a Portal Gateway to the Customer Org
We need to provide a link to initiate the single sign-on process from within the customer org. The link URL should include the site Id and starting page and follows the format:
https://login.salesforce.com/services/auth/sso/[18digitOrgId]/[urlSuffix]?site=[siteUrl]&startURL=/home/home.jsp
The base URL is the “Single Sign-On Initialization URL” which you can obtain from the Authentication Provider detail page, and has a similar format to the callback URL.
For the site URL, use the “Secure Web Address” from the Site detail page.
Here’s an example link URL:
https://login.salesforce.com/services/auth/sso/00DG0000000aaaaAAA/community?site=https://foobar-developer-edition.na11.force.com/community&startURL=/home/home.jsp
Now all we need to do is to provide a the link for this URL in the customer org.
In production, you will most likely provide the link as a part of a managed package – for example within a Visualforce page.
For our purposes we will simply create a Custom Link and Home Page Component directly in our customer org:
Setup | App Setup | Customize | Home
First, create a Custom Link, called “SSO”, the behaviour is to “Display in a new window”, and paste the full initialization URL into the main content field for the link:

Next, create a new Home Page Component, also called “SSO”, where the type is “Links”. Add the SSO custom link to this component.
Finally add the home page component to your existing home page layout, or create a new layout and assign it to your admin user.

Single Sign-on Test
Log in to the customer org.
If you have previously tested the single sign-on with the “Test-Only Initialization URL”, you can revoke the authorisation to retest the entire authentication process:
Setup | Personal Setup | My Personal Information | Personal Information: Remote Access (related list)
Click on the “SSO” link on your home page to start the authentication process. If you have set up the Custom Link as described above, this will open in a new window.
Click “Allow” to agree to provide access to your customer org basic user information.
You should now navigate straight to the Portal home page:

Note the Force.com Site domain in the address bar.
Browse the Portal pages, and then return to your original browser window. You should find that you are still able to browse your customer org – both customer org and Portal sessions are working concurrently.
Now log in to your vendor org and look at your list of users:
Setup | Administration Setup | Manage Users | Users
If you are successful, you will find that you have a new High Volume Customer Portal user.
View the detail page for this user:

You will see a link to the related Contact, which is the contact you set up when configuring the Portal.
The new High Volume Customer Portal user and its association to the Contact were set up automatically when the customer org user signed in to the Portal via single sign-on.
You will also see a related list of “Third-Party Account Links”, showing the external user who authenticated (the customer org user) and which Auth Provider was used to authenticate the user:

Further Possibilities
The Registration Handler plugin provides a great deal of flexibility.
For example, if you provide licensed managed packages to your customers, and your Customer Portal is set up in your Licence Management Org, you could query for licence records when deciding how to create the Portal User.
We have been using the presence of a Contact record to determine whether or not to grant access to the Portal. However, alternatively we can create Contacts within the registration handler.
This tutorial has been published on wiki.developerforce.com
